Sidebar
custom_tables
Table of Contents
Custom Tables
The standard Table field is very easy to use - just select the format with the number of lines, image, and hidden information that you want, and then set a data query to populate the table. But even this can be limiting when you think of the many kinds of scrolling tables that you see in various mobile apps every day.
The following describes two ways to create tables that are practically limitless in their customization. You can look for the template app called Simple and Custom Tables to see these examples in action.
Change the Style of Standard Tables
 Since all of the user interface elements in ViziApps are rendered with HTML technology, it is possible to customize the look of a field by changing its CSS code. This example uses a ViziApps library file called field_helper.js which is loaded with its own <script> tag.
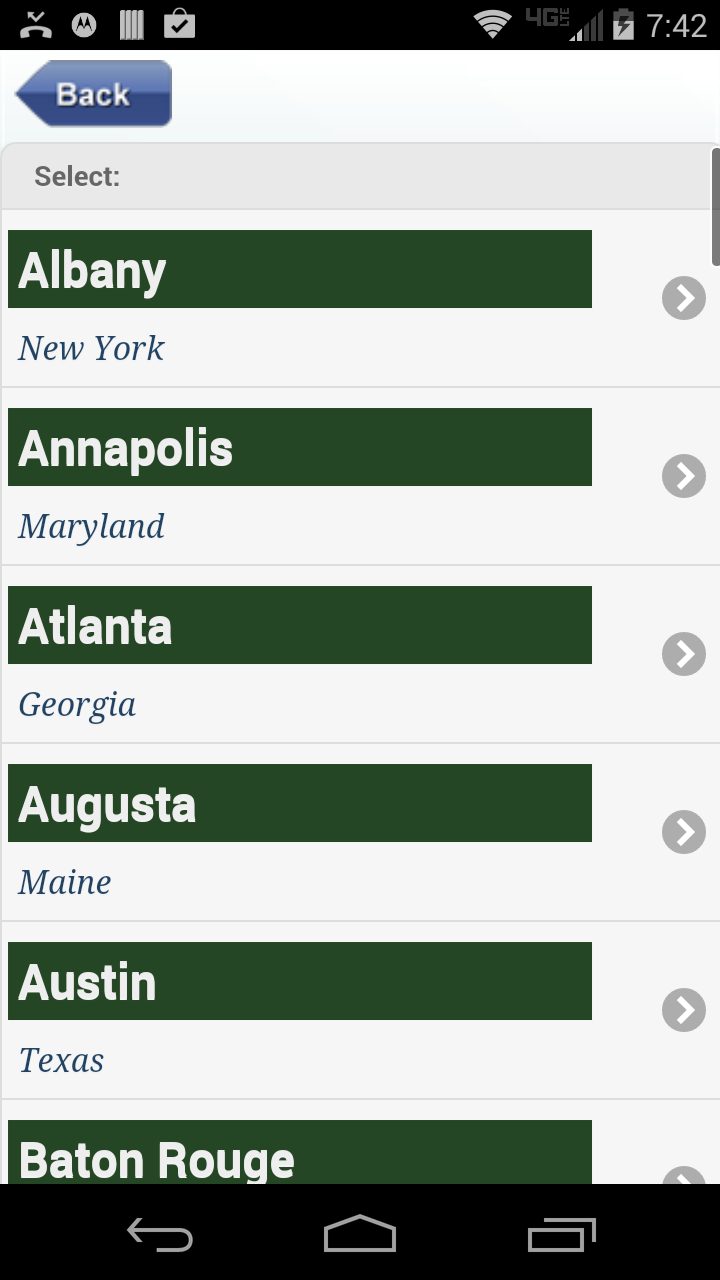
The function fieldhelp.tableStyle() is called with two parameters, the first is a CSS statement for the main title in each table row, and the second optional parameter specifies the subtitle in each table row. Because these styles apply to all standard tables, you can call this function once and all tables in your app will take this custom style. However, you could also call this right before a page is shown with a specific style for the table on that page.
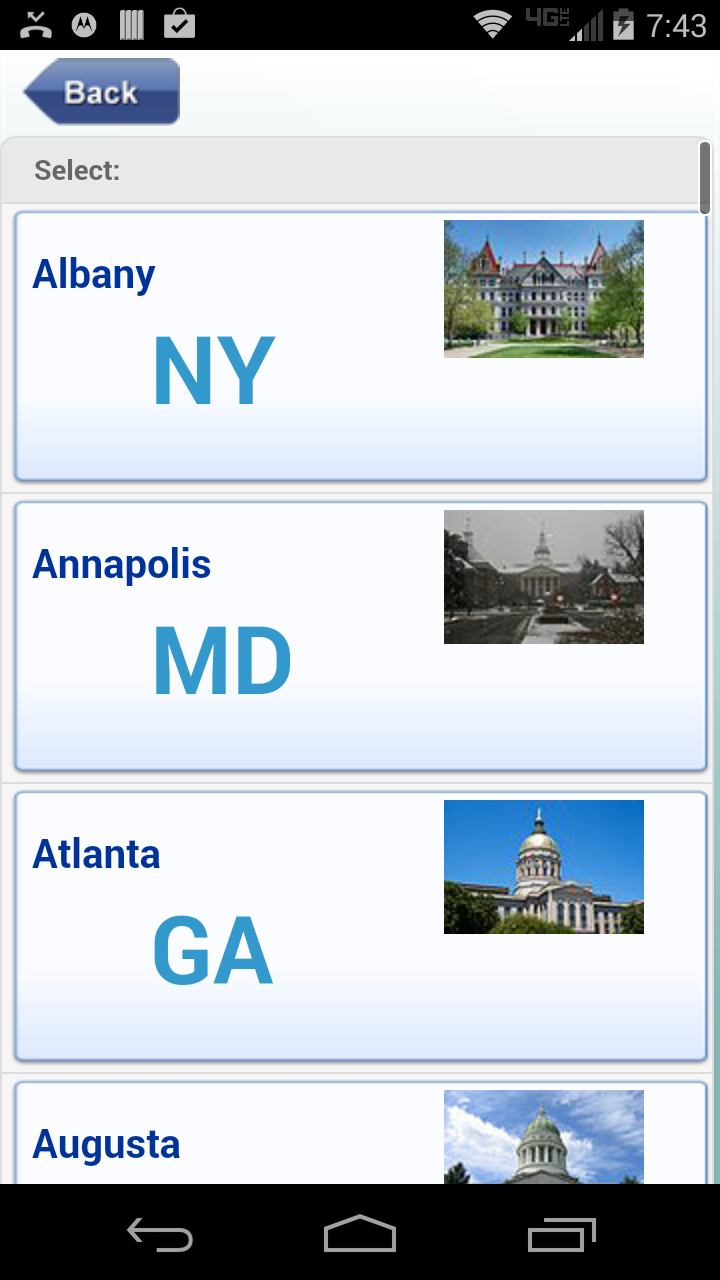
The particular set of CSS statements in this example produces the table style in this image. Each CSS style element is a CSS keyword and its value separated by a colon, and the CSS statement is a set of these style elements, each separated by a semicolon. Some of the most common CSS style elements that you are likely to change include: font, color, border, background, and margin. Also, use this convenient color picker tool to select color values for your CSS styles.
<script src="https://s3.amazonaws.com/viziapps/apps/Studio/field_helper_1.0.0.js"></script>
<script>
var fieldhelp = new v.fieldHelper();
var titleStyle = 'font: bold 18pt arial, sans-serif; background-color:#254625; color: #EEE; border-top: thick #ff0000;';
var subtitleStyle = 'font: italic 12pt "Times New Roman", serif; color: #214262';
$(window).on('load', function()
{
    fieldhelp.tableStyle( titleStyle, subtitleStyle );
});
Build a Custom Table
A custom table allows you to arrange fields with any combination, complexity, and design styles that will define each table row. Place a Table field in your app and open its Dialog property box, and you'll see a tab at the top called Custom Row Template. 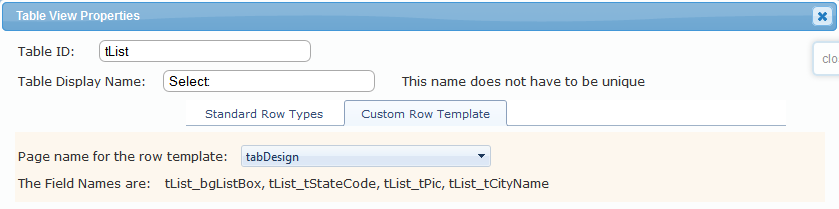
To use this powerful feature, first create a new page in your app. This page won't be directly displayed to a user, rather you will use this page as a design template for a single row of your custom table. 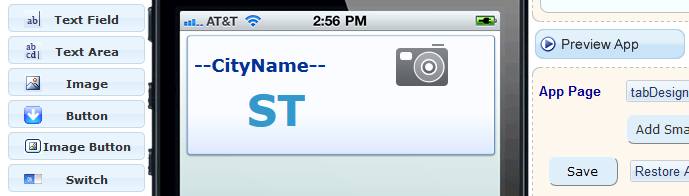
 For example you can place a background image that will appear as a background and border for each row. Add labels and images and set their formats and locations to display exactly how you want data in your table to appear. Then Save the template page.
Now return to your Table field properties dialog, click on the Custom Row Template tab, and then in the Page name for the row template, select the name of the new design template page. That's it!
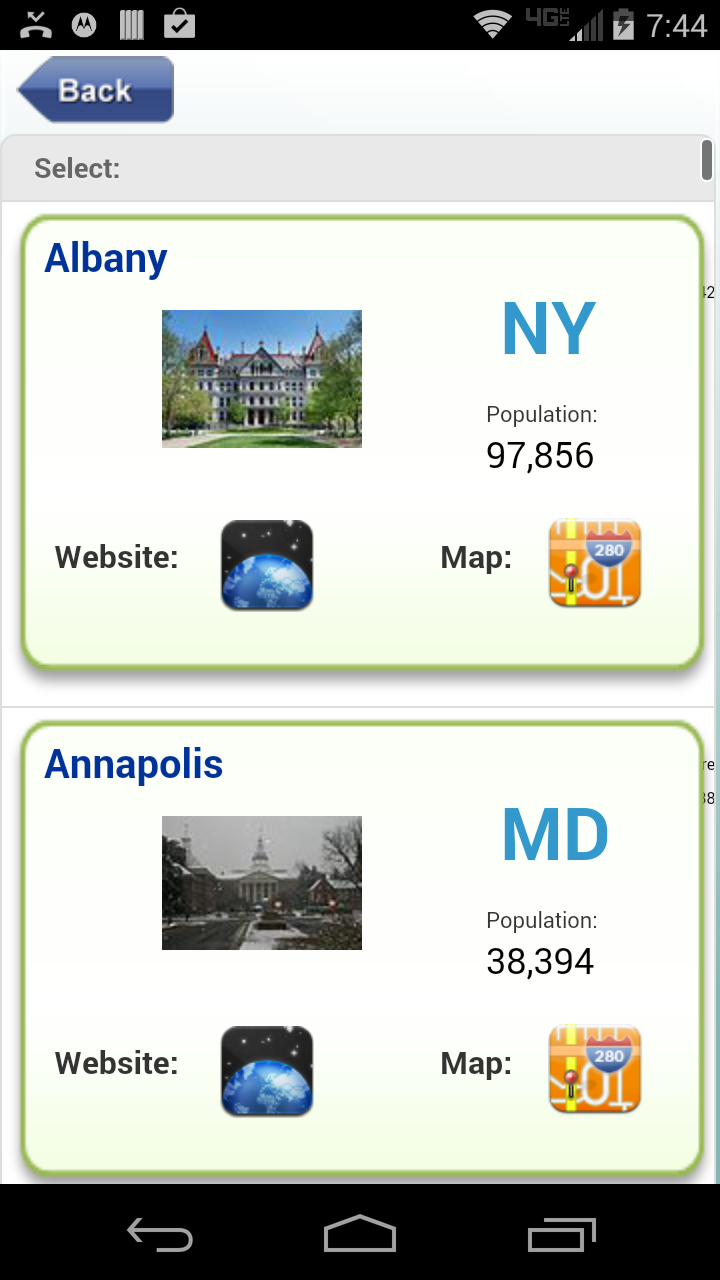
When you use this Custom Table for a data query, you will notice in the Storyboard that the new fields you added have longer names because the name of the table has been prepended to each of the field names. This is because your design template page can be reused to define multiple Custom Tables on different pages. However, you still use a Custom Table in the exact same way that you use a standard Table field. You can assign remote data fields (columns) to any of your Custom Table row fields. You can also set the row tap event so that a user simply taps on the Custom Table row to make a selection.
Add Buttons to a Custom Table
Sometimes a user experience is best handled by placing buttons directly within each row of a scrolling table. Here's an example of a row template page where two buttons have been added which allow the user to launch to a website or a map. 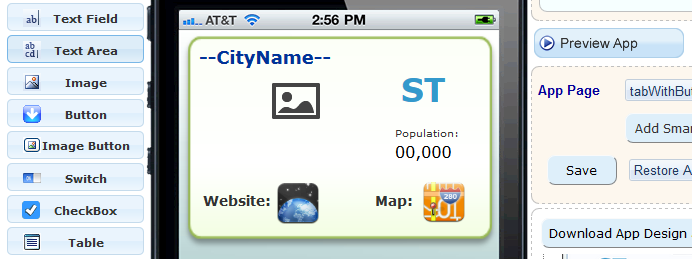
 You can't place buttons in your row template design page, however you can place image fields or text fields but they will require a little JavaScript code. Use the fieldhelp.rowButton() to make these fields work like buttons:
- The first parameter is the name of a field in your Custom Table that you want the user to tap, but note that this must be the complete field name including the table name prefix.
- The second parameter is a field name in your row template that will get passed to the button event handler, which is often a hidden field, but could also be a label in each row.
- The third parameter is a function that will be called when the field is tapped. In this example, another function in fieldhelp called browser() accepts a URL and launches a browser.
The function installRowHandlers() in this code example is called for each of the two images in the row template that will act like buttons - one for a website URL and one for a map URL. This function would be called every time that the Custom Table has been filled with new data, typically as a Device Action after a Data Command.
function installRowHandlers()
{
    fieldhelp.rowButton( 'tableAction_imagePopWebsite', 'hWebsite', fieldhelp.browser );
    fieldhelp.rowButton( 'tableAction_imagePopOnMap', 'hMapUrl', fieldhelp.browser );
}