Sidebar
quickbase
Table of Contents
Quickbase
Your mobile device can directly interface with Quickbase data, using visually created query commands in a graphical tree. The query commands include insert, update, select and delete.
These commands will run when a user taps a button or table row on your device.
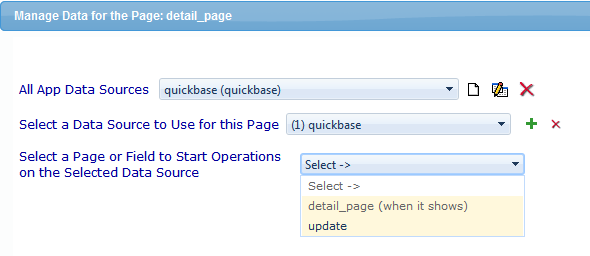
Register Your Quickbase Database with ViziApps
To enable your app to connect to Quickbase, follow these steps in the registration dialog:
- Enter a unique Data Source ID among other data sources in your app.
- Enter the first part of your Quickbase domain name for your Quickbase account:
- Enter your Quickbase Admin username.
- Enter your Quickbase Admin password.
- (Optional) Enter your Quickbase Application Token
- (Optional) If you want your app to allow logins on the mobile device for users in sub accounts, enter the names of the fields used for the username and user password. Don't confuse this with the actual username and passwords which only will entered by the user when the app is running on the mobile device.
- Click on Get Databases and then select the database you want to access for this data source.
- Click Save, wait for the save message to appear, then close the dialog.
Set up data-use fields and events
One of the most common ways to display data for a user is to first present a scrolling list of selections within a Table Field  . A typical configuration is to show 2 text fields (a title and subtitle) with a hidden field that is used as a primary key into the data set for requesting more information after a user taps a table row.
How does your app know when to query Quickbase and fill in the table? Very often you will simply want the user to tap a button. Create a Button Field  , then configure the tap event to: “Get or send device data via a web data source”. Later, when you set up the Manage Data properties for the page containing the new button, this button event will appear as a trigger source for initiating a query.
Build the query
- Back in Manage Data for the Page, select the Field to Start Operations, e.g. the Button Field that you created earlier and assigned to Get or send data.
- If your query is triggered from a button event, you may want to have the page changed so the user will see the results. Before inserting query commands, click the Add Device Action button, select Go To Page, and then select the page that will show the query results, such as the page containing a Table Field.

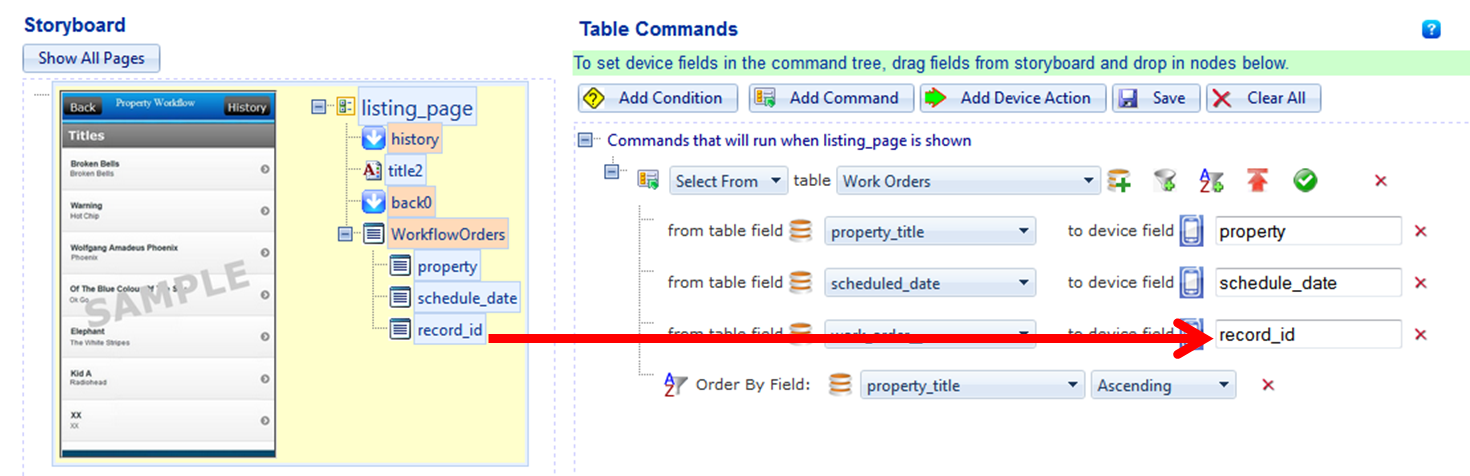
- Click the Add Command button, and then click the Add Field icon.
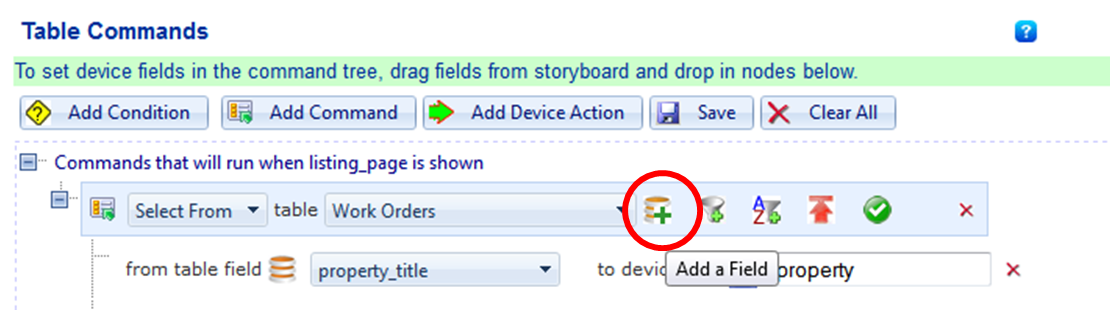
- Continue adding fields for each item that you want to use. For each item, select the column header name from the worksheet field, and then type the name of a ViziApps field or drag a field name from the storyboard on the left.


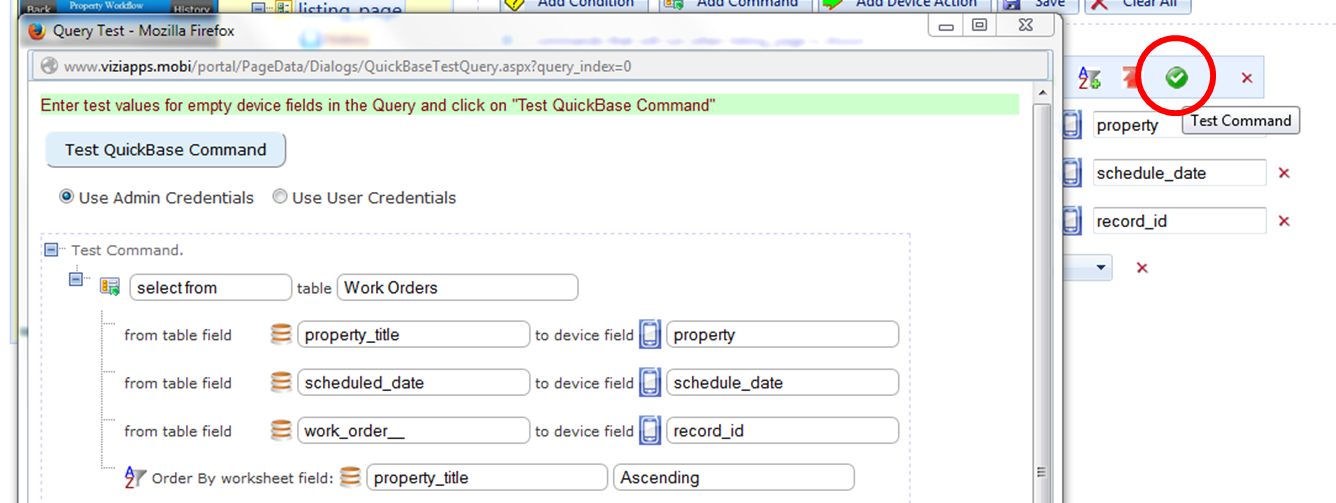
Test the query
- Click on the Test Command icon to make a live query to the web source and verify that the correct data is received.
- Save the query and close the Manage Data page.
- Click on Preview App to test your app live, right in your web browser.
