Sidebar
google_drive_spreadsheets
Table of Contents
Google Drive Spreadsheets
One of the easiest ways to share a set of data with mobile app users is to put the data into a spreadsheet in your Google Drive account. You will be granting all of your mobile app users the ability to read and possibly update this spreadsheet, even if the spreadsheet has not been made public.
In order to give ViziApps and your users the permission to access the spreadsheet, you need to follow a registration process for authentication called OAuth 2.0, which allows this permission to happen securely and without using or exposing your account's username and password. This guide will walk you through the OAuth 2.0 registration process and the process to connect your app to the spreadsheet.
Structure and limitations of Google Sheets
This example uses a Google Drive spreadsheet as a data source (called a Google Sheet) that is a set of data about US Capital cities and their Capitol buildings. You can see this spreadsheet called CapitalFactBook. While a spreadsheet could have all kinds of structure, you must follow certain rules or else ViziApps won't be able to access your data.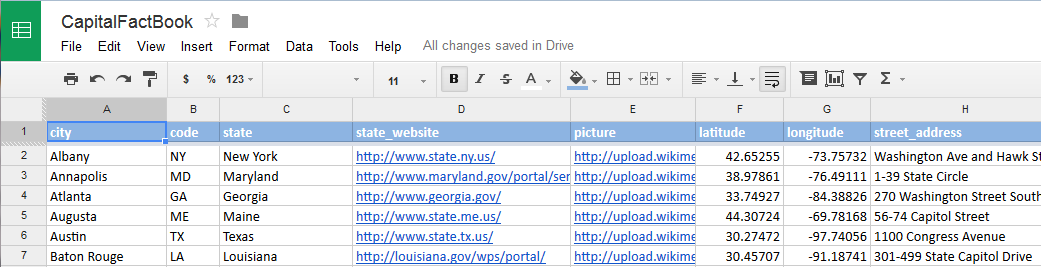
You will notice that the first row is a set of names - these are the column headers and must appear in the first row. Your mobile app will access your data by rows, and the only way your mobile app will be able to figure out which data to use is by these column header names. Column header names must have no spaces, no capital letters, and begin with a letter. Cell color is ignored. You can use formulas anywhere, however the formulas won't be read or written; only the data as normally viewed is transferred to your mobile app.
If you change the structure of your Google Sheet, such as adding a column or changing a column header name, ViziApps will not know about it and your app may break. In this case, you need to edit your Google Spreadsheet Data Source (as described below), re-select your spreadsheet, and then save your app. If your app is published, you will also need to “Save Test Design to Publishing Design” under “Brand Apps for Publishing”.
As of April 2014, Google has greatly reduced the limitations and improved the performance performance of Google Sheets, which you can read about here: Check out the new Google Sheets
Set up data-use fields and events
One of the most common ways to display data for a user is to first present a scrolling list of selections within a Table Field 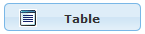 . A typical configuration is to show 2 text fields (a title and subtitle) with a hidden field that is used as a primary key into the data set for requesting more information after a user taps a table row.
How does your app know when to query the Google Sheet and fill in the table? Very often you will simply want the user to tap a button. Create a Button Field 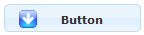 , then configure the tap event to: “Get or send device data via a web data source”. Later, when you set up the Manage Data properties for the page containing the new button, this button event will appear as a trigger source for initiating a query.
Manage Data
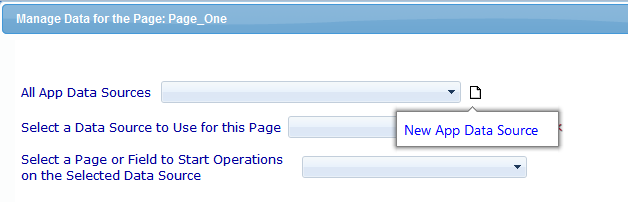
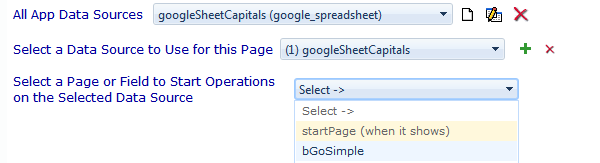
- Select the page that contains the button that will trigger the data query, and then click on “Manage Data”. In the Manage Data for the Page dialog, click on the New App Data Source icon:

- The select “Google Spreadsheet” for the New Data Source Type:

- In the new Google Spreadsheet Data Source, enter a Data Source ID, which is a name that ViziApps will use to reference this data source:


Create Google Project
- Click on Go To Google Drive
 to open the Google Developers console, and log in to your Google Drive account if you are not already logged in.
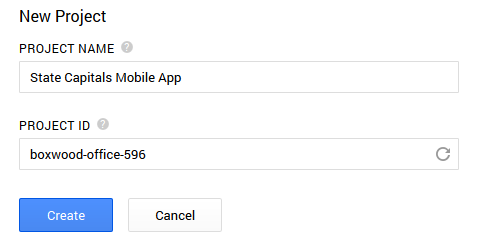
 - Click on the Create Project button, enter a new project name (we suggest that you use your app name), and click Create.
- Wait a moment for the new project to be created and you should see its Project Dashboard.
Create Google Client ID
- In Google Developers Console, click on APIs & Auth (left-hand menu), click on APIs, then look for and enable Drive API.
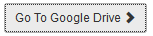
- Click on Credentials (left-hand menu), then click Create New Client ID.
- Select “Web Application”, delete the AUTHORIZED JAVASCRIPT ORIGINS.
- Enter https://auth.viziapps.mobi/auth into AUTHORIZED REDIRECT URI.
- Click Create Client ID.


Name the Google Project
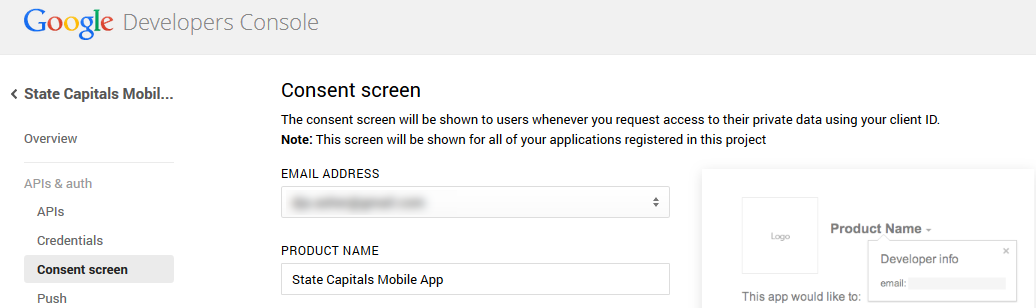
- In Google Developers Console, click on APIs & Auth (left-hand menu), then click on Consent screen.
- Write your app's name into the PRODUCT NAME.

OAuth2 Registration with ViziApps
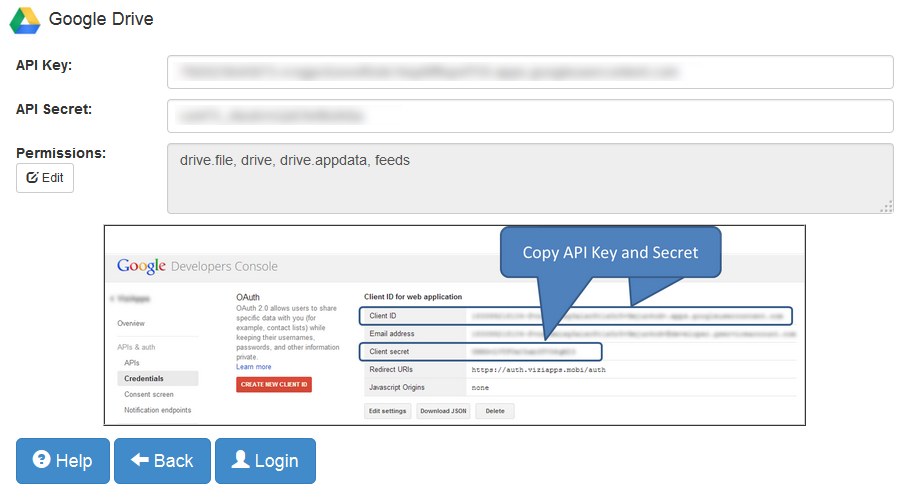
- You should see a new Client ID for web application in the Google Developers Console. Select and copy the Client ID string.
- Return to the ViziApps Google Spreadsheet Data Source, click Next.
- Paste the Client ID string into the API Key text entry.
- Go back to Google Developers Console. Select and copy the Client Secret string.
- Return to the ViziApps Google Spreadsheet Data Source, and paste the Client Secret string into the API Secret text entry.

Setup the Data Source
- In the ViziApps Google Spreadsheet Data Source, click Login.
- You may be challenged to enter your Google Drive username and password. This is a login screen presented directly by Google. ViziApps has no access to your Google Drive credentials.
- You will be presented with a permissions page where Google is alerting you to the fact that your new app will be gaining access to your Google Drive account. Click Accept.
- The Data Source dialog now shows a list of spreadsheets that are in your Google Drive account. Select the Google Sheet that you would like to use for this Data Source.
- Click Save, then close this dialog. You may also close the Google Developers Console.


Multiple spreadsheets with the same name can cause errors, even if they are in different folders. Make sure that the Google Sheet you select has a unique name within your Google Drive account.
Build the query
- Back in Manage Data for the Page, select the Field to Start Operations, e.g. the Button Field that you created earlier and assigned to Get or send data.
- If your query is triggered from a button event, you may want to have the page changed so the user will see the results. Before inserting query commands, click the Add Device Action button, select Go To Page, and then select the page that will show the query results, such as the page containing a Table Field.

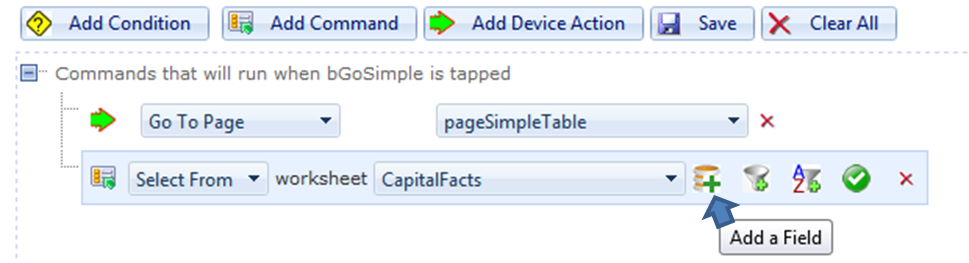
- Click the Add Command button, select the worksheet within the Google Sheet, and then click the Add Field icon.

- Continue adding fields for each item that you want to use. For each item, select the column header name from the worksheet field, and then type the name of a ViziApps field or drag a field name from the storyboard on the left.


Test the query
- Click on the Test Command icon to make a live query to the web source and verify that the correct data is received.
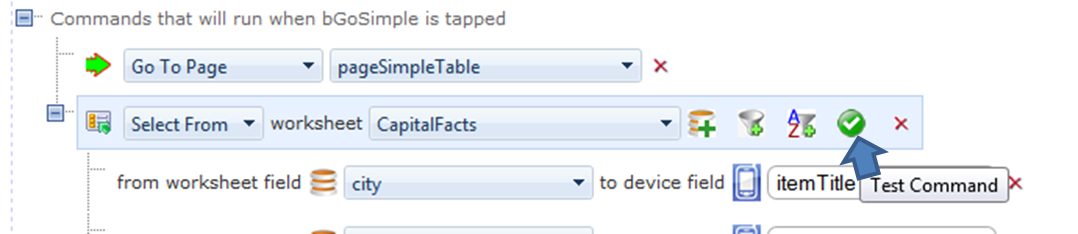
- Save the query and close the Manage Data page.
- Click on Preview App to test your app live, right in your web browser.
