Sidebar
branding_and_building_apps_for_publishing
Table of Contents
Branding and Building Apps for Publishing
The process of branding applies several properties to your app in preparation for publishing: an app name; an app launching icon; an app version number; and a splash screen which the user sees briefly when the app is starting.
Your app must be built into a code file in order to be submitted to an App Store. This is a .ipa file for Apple iOS apps, and a .apk file for Google Android apps. A single app design may be submitted multiple times for publishing to different app stores.
Example: If you have a design called Ticketer and you want to create a build to submit it to both iTunes and Google Play. You will need to create two separate builds. First time you will need to select your Target Platform as “iOS” and the second time “Android”. Also two separate payments are to be made - one for each build.
After your app is published, when you update your app's design you do not need to repeat this branding and building process, and do not need to upload to the app stores again. Return to the Brand Apps for Publishing page, select your published app from your account list, and click on Save Test Design to Publishing Design.
Branding your ViziApps App
- Go to Publish Tab in the ViziApps studio and to the “Brand Your App For Publishing” page.
- Select your App from the pull down menu.
- Provide a “Publishing App Name” and press the button “Save Publishing App Name”
- Provide a “Publishing App Version” and press the button “Save Publising App Version”
- Press the button “Save Test Design to Publishing Design”.
- Select an icon file that is 512×512 png format and press the button “Upload File”
- Select a splash file that is 768Wx1204H) png format and press the button “Upload File”
- Press the button “Verify Branding Steps”
- Confirm that you get the message: All items on this form are complete.
In the Preview App mode of ViziApps Studio, you can click on the Capture Screen Shot button to easily take screen shots that can be used for posting in the app stores.
Build Files for iOS Apps
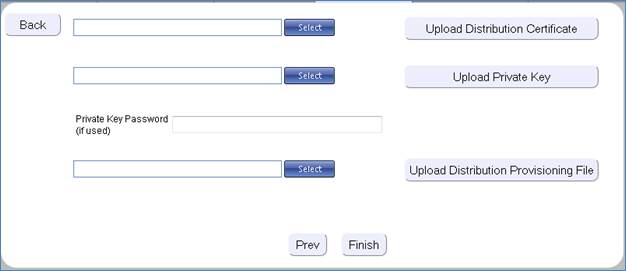
Creating a build file for an iOS app has special requirements; three additional files are required:
- Distribution Certificate File
- Private Key file
- Distribution Provisioning Profile File
Carefully follow these instructions for creating this set of files: Create iOS Publishing Files
Building your App
- Go to Publish Tab in the ViziApps studio and to the “Build Apps For Publishing” page.
- Select your App from the pull down menu.

- Select a target platform for your build. (Android or iOS)

- If the payment for this specific app store build was already done the payment step will be skipped. If you have not paid you will be taken to the payment page.
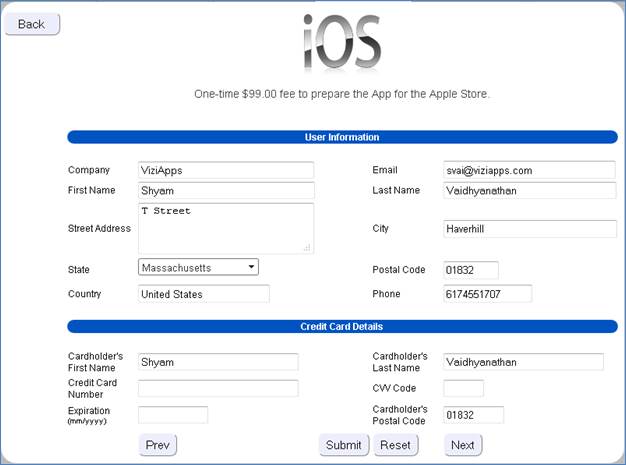
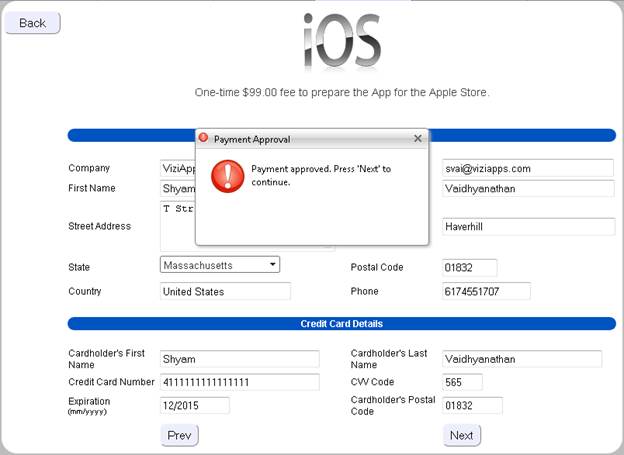
- Fill out all the payment details and press the ‘Submit’ button. Once the payment has been approved by our payment processor, you should see the following message.
- For Android the build will get submitted right after this. In the case of iOS you need to provide the 3 files mentioned in the previous section and then press “Finish”. The build will get submitted after that.
- You should see the following message on screen


Download Your App Build
- You will receive a confirmation email from ViziApps.
- Log in to ViziApps Studio and go to the Publishing tab.
- Click on “App Store Builds”
- You should see the list of builds with links to the builds.
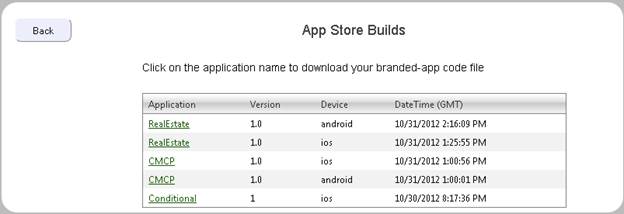
- Click (or right-click) on the link for the app build you want and save the code file to your computer.

Please include viziapps.com into your safe email sender list so the important confirmation messages are not caught in a spam filter.